Neck injuries are often difficult to photograph. Too many curved surfaces and shadows! (Edinburgh Course, 16-19 Oct 2017)

Sabrina @xsabiex works her magic on Soren Moore’s wrist: hands and wrists are common sites for injuries (Edinburgh Course, 16-19 Oct 2017)

Facial abrasions are very frequently seen. (Edinburgh Course, 16-19 Oct 2017)

Injuries behind the ears can be tricky to document as the ears tend to get in the way! (Edinburgh Course, 16-19 Oct 2017)

“You should see the other guy…” Black eyes are another common injury. Always remember to take the photos with the eyes open and the eyes closed, but tell the patient “Don’t screw your eyes up.” (Edinburgh Course, 16-19 October 2017)

With his extensive film and TV career going from strength to strength, Jason looks relaxed being made-up by Bella Larter (Portsmouth Course, 4-6 Dec 2017)
![]()
“Melanoma” of right cheek. Biopsy revealed highly-aggressive latex. (Portsmouth Course, 4-6 Dec 2017)

Clever stuff from Bella Larter (Portsmouth Course, 4-6 Dec 2017)

“Houston… we have a problem.” (Portsmouth Course, 4-6 Dec 2017)

Soren flashing at Rebecca A. (Portsmouth Course, 4-6 Dec 2017)

Rebecca A laughing about it (Portsmouth Course, 4-6 Dec 2017)

Soren shows Lyndall his holiday snaps. (Portsmouth Course, 4-6 Dec 2017)

Incised wounds may have ragged edges, depending on the blade edge. (Portsmouth Course, 4-6 Dec 2017)

Rebecca W trying to establish if it’s the right or left hand. (Portsmouth Course, 4-6 Dec 2017)

Jason on bended knee. (Portsmouth Course, 4-6 Dec 2017)

Chloe Santiago performs her make-up wizardry on Alain! (London Course, Jan 2018).

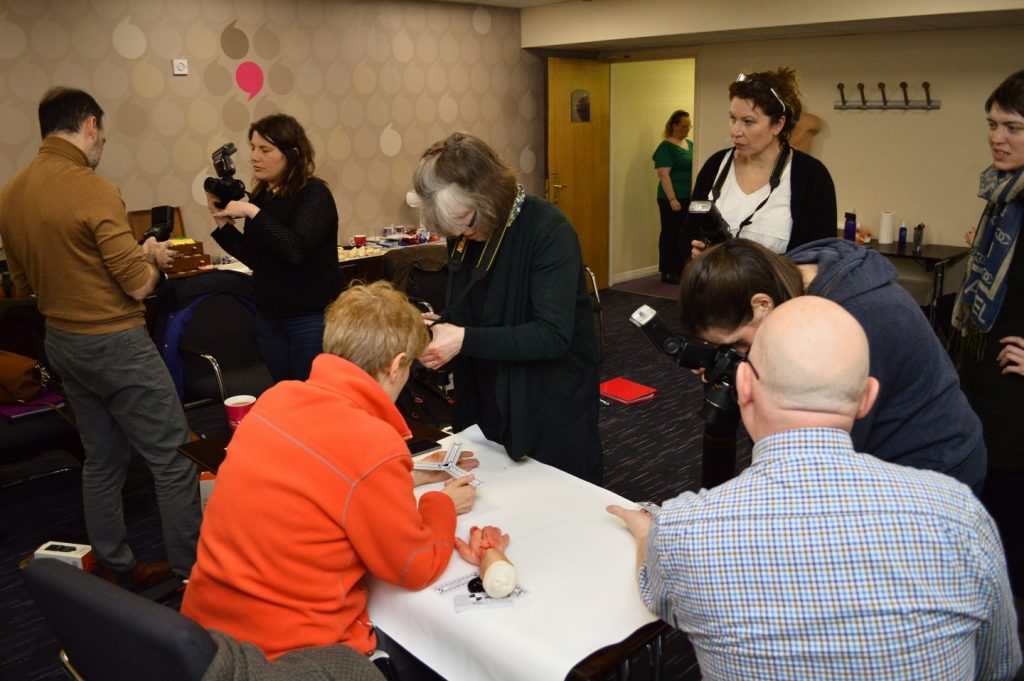
The group photographing each other, mock injuries and mannequins.

Remember to look out for background clutter: once noticed, it’s difficult to un-notice. Move the subject, move the clutter, move yourself, or do all three! (London Course, Jan 2018).

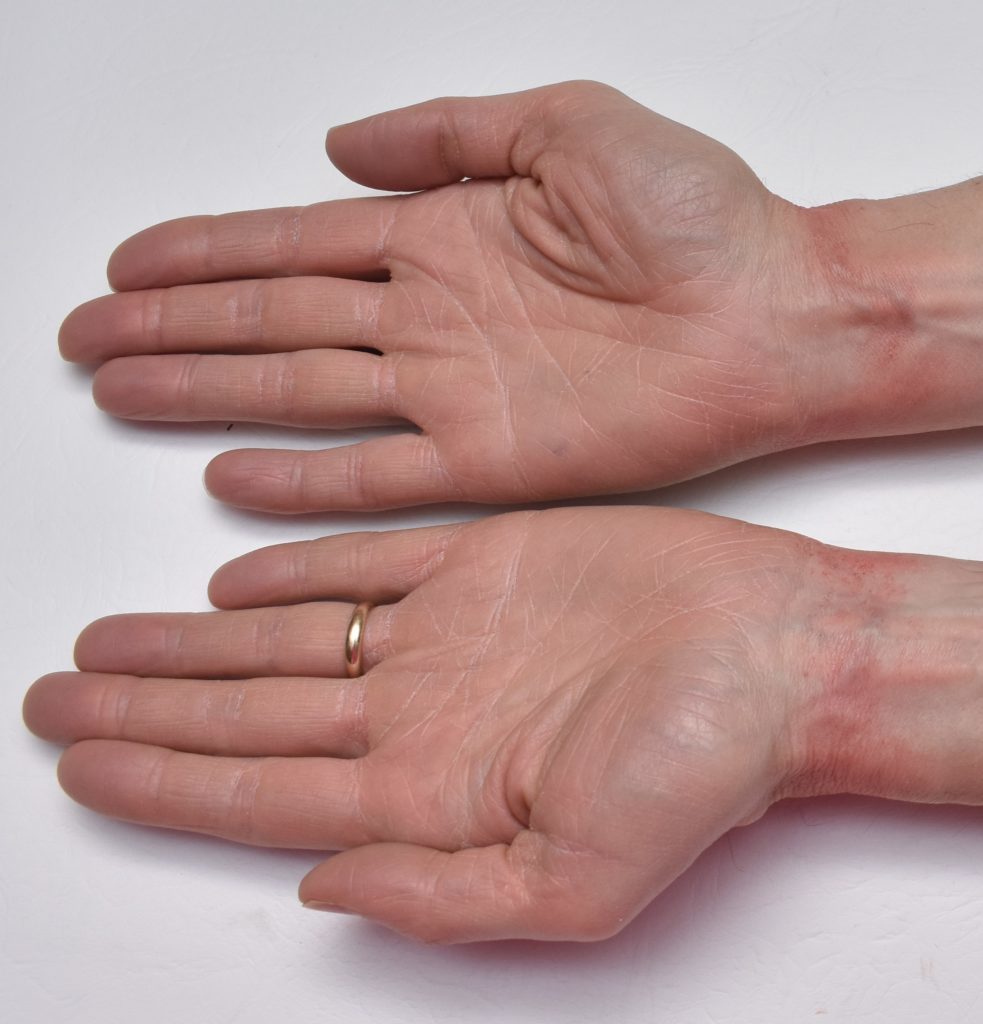
Try to centralise the area of concern and consider removing jewellery: it can take your attention away from the real area of interest. (London Course, Jan 2018).

Linear scales are always difficult to place in curved areas. A shadow between the scales and the skin suggests that the scales were not flush with the skin. (London Course, Jan 2018).

“Fill the frame”. If something lends itself to portrait or landscape, hold your camera accordingly, otherwise you’ll end up with a lot of wasted space in the background. (London Course, Jan 2018).

Consider background sheeting… (London Course, Jan 2018).

A simple matt plastic sheet of a neutral colour can make a real difference. It’s easily cleaned between patients and should not reflect flashlight. (London Course, Jan 2018).

Avoid mergers! Jen looks unimpressed that Khalid is growing out of her left shoulder. (London Course, Jan 2018).
Keep the camera perpendicular to the skin, to avoid angular distortion. (London Course, Jan 2018).

Align the scales as best fits the area of concern, and not at an angle as demonstrated here… (London Course, Jan 2018).

Many injuries and lesions have a natural length and width. (London Course, Jan 2018).

Yvain demonstrating how to hold the camera and scales at the same time: can be difficult and cause camera shake! (London Course, Jan 2018).

Remember to tell the patient how you want them positioned for the photos: you are in control of the situation. Tara definitely in control here! (London Course, Jan 2018).

Nishat and Soren compare the images from SLRs with other cameras (e.g. compacts, bridge, smartphones): a useful exercise that we carry out on the course. (London Course, Jan 2018).

Try not to obscure the surrounding landmarks. It can make it difficult to interpret the image. Always check your photos for blurring and repeat if required. Do NOT delete bad photos if required for forensic cases as you may be questioned as to what you’ve done with them. (London Course, Jan 2018).

Sides of noses are another tricky one: make sure you don’t poke the patient in the eye! (London Course, Jan 2018).

Blistering of the hands is a common injury: consider photographing the other hand for comparison. (London Course, Jan 2018).

The circle on the scales appears round, suggesting that the camera was held perpendicularly to the skin. If taken at an acute angle, the circle appears more elliptical. (London Course, Jan 2018).
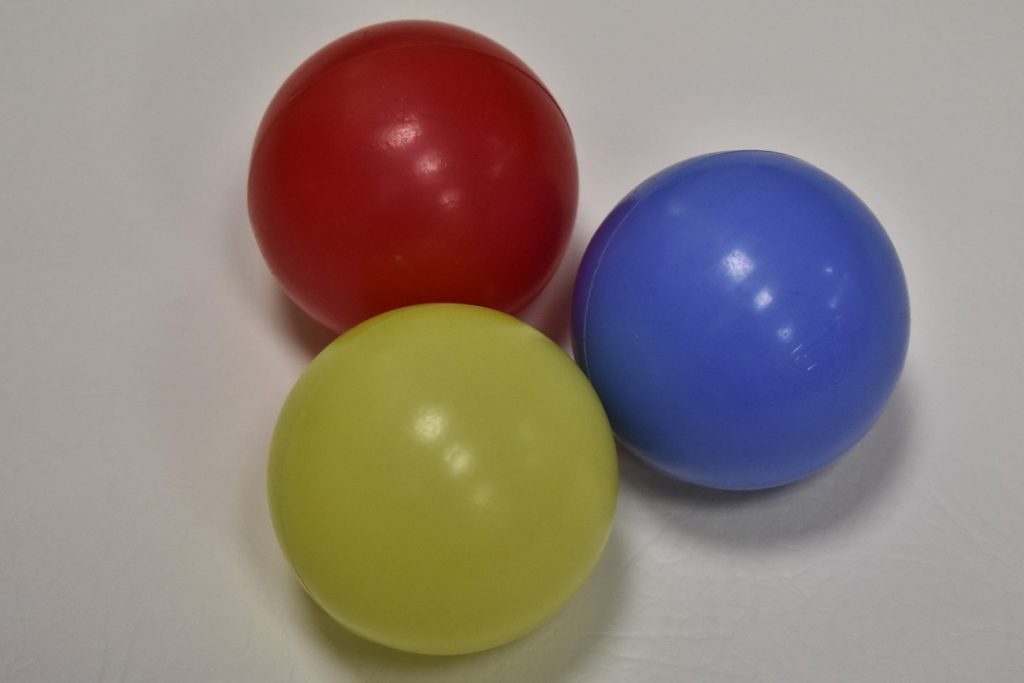
Red, green and blue balls… (London Course, Jan 2018).

Appear different shades in different lights… (London Course, Jan 2018).

And with different “White Balance” settings. (London Course, Jan 2018).

Using the viewfinder (rather than holding the camera at arm’s length, and viewing the monitor) reduces camera shake as the camera is held more closely to the body. (London Course, Jan 2018)

When photographing the chin or neck, you may need to get the patient to hyperextend the neck and also bend yourself down (London course, March 2018).

If using background sheeting, make sure that there are no visible creases (London course, March 2018).

Web-space injuries can be tricky: stretching the fingers can open wounds and make things uncomfortable for the patient. Getting the scales in the plane of the injury can be a problem (London course, March 2018).
![]()
When photographing behind the ear, don’t place the scales in front of the ear: the injury will appear smaller than it truly is (London course, March 2018).

The orbital ridge produces shadows which can make a bruise appear worse than it actually is (London course, March 2018).

Soren: lost for words at the very high quality of the students! (London course, March 2018).

Make sure that your neck strap doesn’t fall forwards at the critical moment. (London course, March 2018).

Check your images as you go along. If the scales cover the area that you are photographing, repeat the photo. Consider hair grips to retract the hair. (London course, March 2018).

Don’t be scared to photograph the patient in different positions, e.g. with hand photography, try the hand flat as well as if holding a pint. (London course, March 2018).

The circle on the scales appears elliptical: either the scales weren’t held properly or the camera wasn’t perpendicular. (London course, March 2018).

Shoulder photography: you need to get above the patient. Either get them to lie or sit down, unless you’re prepared to stand on a sturdy chair! (London course, March 2018).

When photographing hands, straighten the fingers…

… to give a more realistic appearance. (London course, March 2018).


Group work (London course, March 2018).

When photographing shiny, reflective surfaces such as moist skin, plastic surfaces or computer screens…

…a polarising filter applied to the front of the lens can reduce glare (London course, March 2018).

Photographing the photographer photographing the photographer: Adalina, George and Soren. (London course, March 2018).

Photographs or body diagrams? Let’s move with the times: good documentation can help victims achieve justice. (London course, March 2018).

Gloves should be used when retracting tissues, but they can alter the feel of the buttons on the camera. Keeley and Carl. (London course, March 2018).

If your scales aren’t big enough for the area of concern, repeat the photo with the scales (inverted) at the other end. (London course, April 2018)

If you have a patient with retained sutures, consider taking a photo. Bear in mind possible medico-legal implications: the evidence is there for all to see! (London course, April 2018)

Suspicious lesions can be monitored much more accurately with regular photography and scales, rather than pen and paper. (London course, April 2018)

Comparing with the normal side is good practice. (London course, April 2018)

Bruising in darker skin can be more subtle than in lighter skin: we teach about the Fitzpatrick Skin Classification (London course, April 2018)

Photographing near windows or near a bright light can cause the subject to appear darker: consider using a flashlight. Or close the blinds… (London course, April 2018)

Direct flash can cause shadowing to appear: less likely with bounce flash. Remember to examine the area for the extent of the injury… (London course, April 2018)

…e.g. turn the hand over. (London course, April 2018)

Despite the bruising, Cecilia looks remarkably calm. (London course, April 2018)

All equipment is provided, though some students prefer to bring their own camera along. (London course, April 2018)

Chloe applying the make-up to a very patient Joe! (London course, April 2018)

Cecilia looking suitably impressed! (London course, April 2018)

Working in pairs is a great opportunity to work things out together. Awatif and Cecilia (London course, April 2018)

We teach about direct and indirect flash. (London course, April 2018)

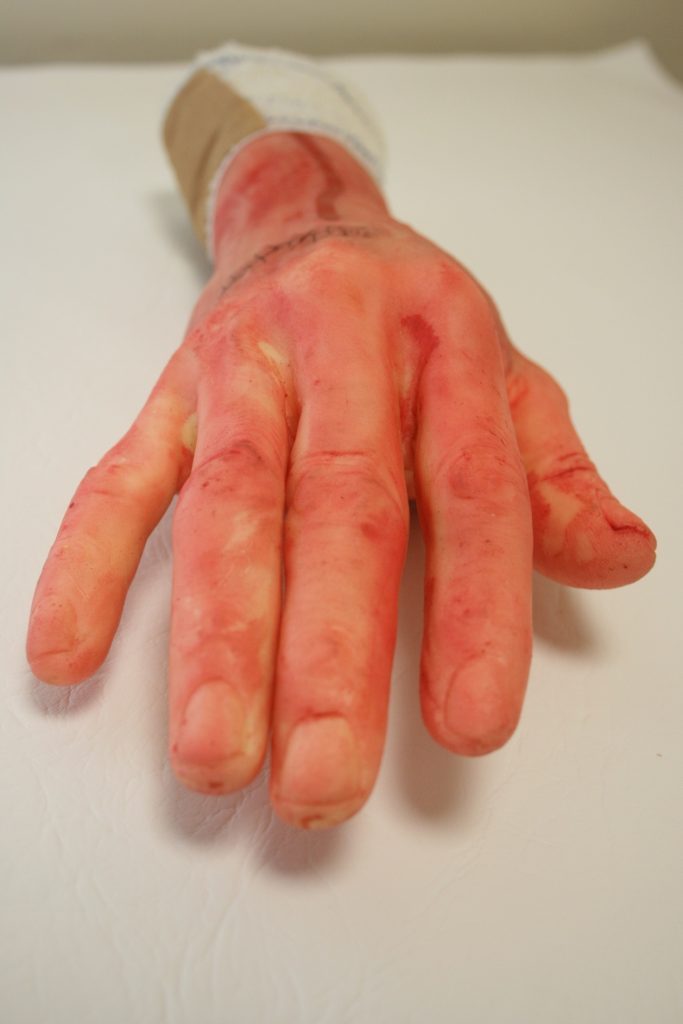
Chloe applying the Deliberate Self Harm (DSH) injuries. (London course, April 2018)

Lindsey looking relaxed with her DSH. (London course, April 2018)

Assessment time: if you score 60% or above, you can apply for Licentiate of BIPP (British Institute of Professional Photography). (London course, April 2018)

Huda and Val taking role play seriously. (London course, April 2018)

Elbow or knee? Or right index finger? Always take a step back to help locate the shot. Overview/ location shot, then close-up, then close-up with scales. (London Course, May 2018)

Make sure the area is fully exposed by removing clothing where appropriate. Tugging at clothes never looks right in photos. (London Course, May 2018)

Make sure that you fully record the extent of the injury… (London Course, May 2018)

… turn over when required, for full documentation, even if there’s nothing to be seen. (London Course, May 2018)
Try to get to a similar height to the patient and the area being photographed. (London Course, May 2018)

Checking photos after each one. Repeat as necessary. Carl, Prerna and Nick. (London Course, May 2018)

Fully expose the knees when photographing them: you may have to get the patient to remove their clothing as trousers often don’t roll up enough. (London Course, May 2018)

When photographing the medial (“inner”) aspect of the knee, you may have to flex the knee and bend it, otherwise the other knee may get in the way of the camera. (London Course, May 2018)

Work with anatomical landmarks, don’t hide them. Try not to put the linear scales in front of landmarks, as it makes it more difficult to interpret the image. (London Course, June 2018).

When using background sheeting, make sure there is sufficient cover, otherwise the edging will be visible. (London Course, June 2018).

Check the images as you’re going along. If the scales are obstructing the area of interest, repeat with the scales correctly placed. (London Course, June 2018).

If the patient holds the scales, their hands may get in the way and they may not hold the scales at the correct orientation. (London Course, June 2018).

… much better to hold the scales yourself while photographing the subject. (London Course, June 2018).

Practising on objects in the medical room can help develop your technique and familiarise yourself with the camera settings. (London Course, June 2018).

Tramline bruising with central sparing is highly suggestive of trauma from a rod-like instrument, such as a baton. (London Course, June 2018).

Lorraine and Rudo taking the role-play seriously… (London Course, June 2018).
Photographing the back of the knees and legs is often better with the patient lying down, rather than standing up. (Lipoma: posterior aspect of proximal left lower leg). (London Course, June 2018).

Charlotte Clemit working her magic! (York Course, Oct 2018)

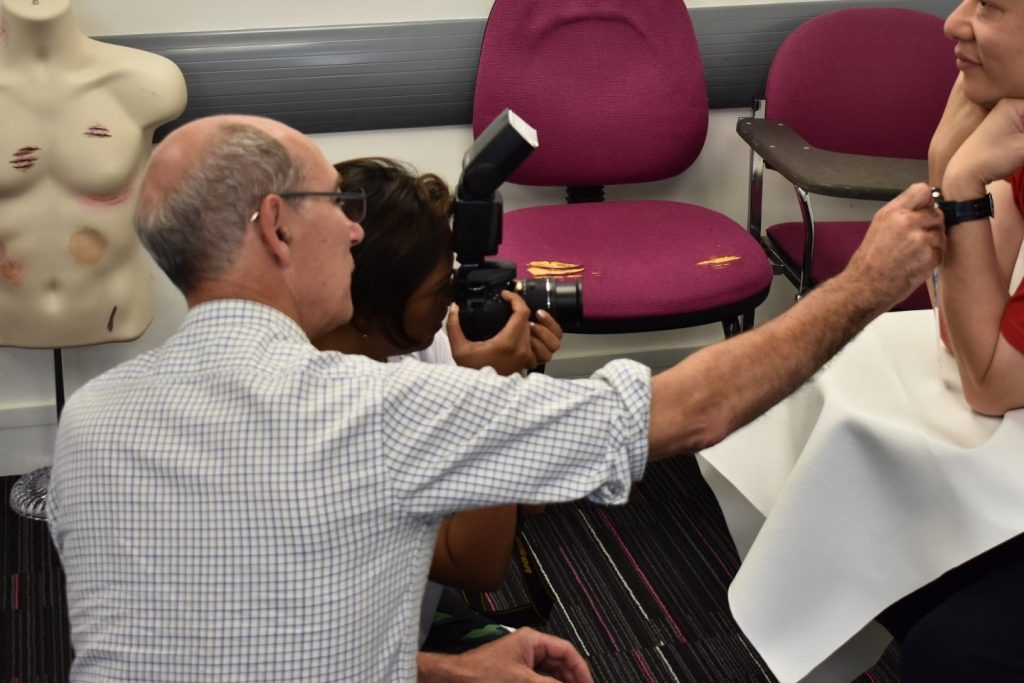
Always check the background before pressing the shutter! (York Course, Oct 2018)

“Take the pledge of allegiance”. Photos of forearm injuries are often easiest with the arm across the chest. (York Course, Oct 2018)

Don’t obscure the area of interest. (York Course, Oct 2018)

Black eyes can be subtle when the eyes are open (York Course, Oct 2018)

Much easier to see when the eyes are closed, but not screwed up (York Course, Oct 2018)

Remember to disinfect the linear scales between patients (York Course, Oct 2018)

Soren’s head comes in handy again (York Course, Oct 2018)

… and in close up (York Course, Oct 2018)

Forehead abrasions (York Course, Oct 2018)

Check both sides…

… you’re less likely to miss an injury. (London Course, Feb 2019)

Nick and Sally discuss the settings on the flashlight. (London Course, Feb 2019)

Time to get away from body diagrams. We need proper documentation for victims, by using digital cameras and linear scales. (London Course, Feb 2019)

Hair can get in the way. Use simple things like combs and hair grips to get a proper view. (London Course, Feb 2019)

White balance can make a huge difference to colouring. (London Course, Feb 2019)

Position the injury in relation to the alleged mechanism, e.g. defensive slash injury to left forearm. (London Course, Feb 2019)

Chloe Santiago creating a “glassing” injury on Sophie. (London Course, June 2019)

Sharon and Helena check their settings. (London Course, June 2019)